Better Nextcloud Photo Albums with Preview Generator and Exiftool
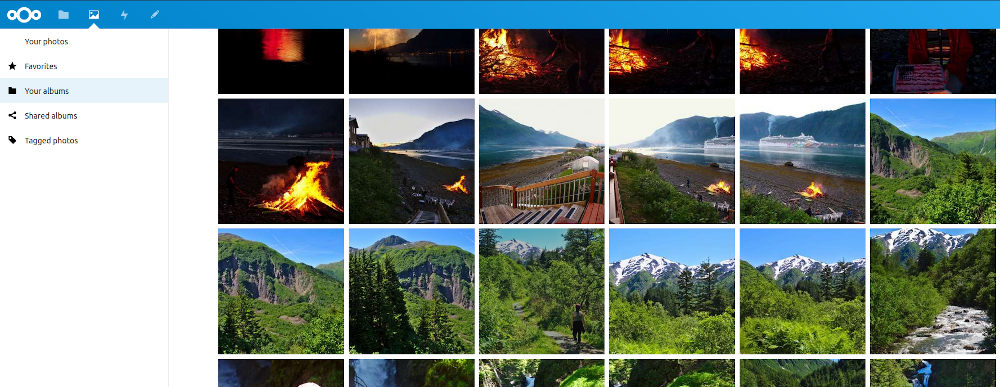
If you host and use a Nextcloud server, you know that it’s good at many things. Unfortunately, displaying photos is not one of them. Since Nextcloud does not read photo metadata, your albums will often appear out-of-order. You may also notice that thumbnails and previews take a very long time to load and flipping quickly through a bunch of photos becomes a painful waiting game.
The good news is that because Nextcloud is a wonderful piece of FOSS that we’re self-hosting, we can make some modifications to smooth out these pain points.
There are (2) pieces of software we’ll be using to accomplish this:
- Preview Generator (Nextcloud app)
- exiftool (Linux app)
Both are freely available from Nextcloud and your distro’s package manager, respectively. Let’s dive in!
Previews and Thumbnails
First we need to fix Nextcloud’s preview generation. By default, Nextcloud generates photo previews and thumbnails on-demand, leading to slow load times. To fix this, we’re going to use the Preview Generator app for Nextcloud to pre-generate previews on a regular basis. That way, your photos are ready to view as soon as you open the folder.
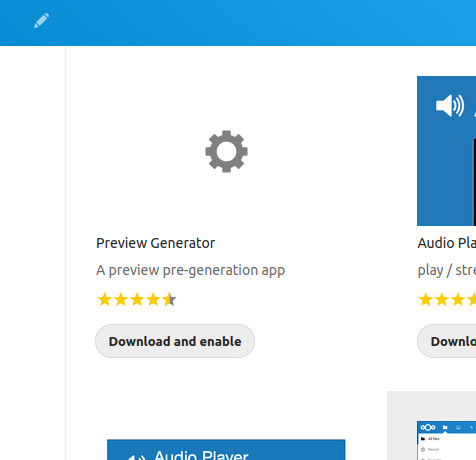
- Install the Preview Generator app for Nextcloud. From a Nextcloud account with admin permissions, navigate to the Apps section and locate Preview Generator under the Multimedia category. Click Download and enable.
-
Configure preview and thumbnail settings. While the default settings work well from a performance standpoint, they cause Nextcloud to generate a huge number of previews and thumbnails for each photo. Once you add a lot of photos, you’ll notice that these previews eat into your storage significantly (sometimes more than the photos themselves). Fortunately, Preview Generator is highly configurable.
SSH into your Nextcloud server and follow the instructions below.
Note: I’ve found that the below settings provide a good balance of resolution, performance, and storage usage for my environment. You can tweak them depending on your needs.
Set the default thumbnail sizes by using the following occ commands:
sudo -u www-data php /var/www/nextcloud/occ config:app:set --value="32 256" previewgenerator squareSizes
sudo -u www-data php /var/www/nextcloud/occ config:app:set --value="256 384" previewgenerator widthSizes
sudo -u www-data php /var/www/nextcloud/occ config:app:set --value="256" previewgenerator heightSizes
Next, edit your config.php to specify the maximum preview size for images. This is going to effect the appearance and load time of images when you click on them.
sudo nano /var/www/nextcloud/config/config.phpFind the below lines toward the end of the file. If they don’t exist, add them to the block.
'preview_max_x' => '2048',
'preview_max_y' => '2048',
'jpeg_quality' => '60',
Save the file and restart the web server.
sudo service apache2 restart -
Generate initial previews. Open a terminal on your Nextcloud server and run the following command:
sudo -u www-data php /var/www/nextcloud/occ preview:generate-all -vvvThe above command is run as the web server user since they are typically the owner of the Nextcloud directory, though you may need to tweak it based on your server configuration.
NOTE: Depending on the amount of photos you have, this could take a while to complete and use a high amount of resources. If you have users beyond yourself, it’s probably best to run it during a low-activity period.
-
Add a cron job. This allows Preview Generator to run continuously generate previews as new photos are added to Nextcloud. To avoid permissions problems, we’ll edit the crontab of the web server user:
sudo -u www-data crontab -eAdd the following below line to the file. The below example runs the command every 10 minutes, but you can set the frequency to whatever you want.
*/10 * * * * /usr/bin/php -f /var/www/nextcloud/occ preview:pre-generateNOTE: If you have a specific version of PHP installed beyond your distro’s default, you’ll want to specify that version of the binary above (e.g.
php7.4instead ofphp).
Photo Sorting
UPDATE 2021-01-26: Added methods to run the script on both client and server systems.
Nextcloud is first and foremost a file sharing application, so it views files just as your file system would. This is great until you get to photo albums, where the EXIF metadata of the photo is more relevant to sorting than the filename or modified date. To be sure that all photos in Nextcloud display in chronological order, we need to get creative.
That’s where the wonderful exiftool comes in. This powerful command-line application allows you to read and manipulate the EXIF data of a photo. The feature that solves our problem is the ability to read the original capture date of a photo and apply it to both the last modified attribute and the filename. This way, no matter how you sort the images in Nextcloud, they’ll display in chronological order.
You have two options for using exiftool:
-
Run a script from a synced client computer.
-
Run a script on the data directory on the server.
The advantage of running it on the server is that you can automate periodic scans of your photos so they are always sorted properly and up-to-date. The disadvantage is that there are some extra steps involved that may take a long time depending on the speed of your server.
To get started using exiftool, follow the instructions below on one of your Nextcloud clients.
Write the script
-
Install exiftool on your chosen Nextcloud client.
sudo apt install exiftool -
Create a new file with the below contents and save it as a script.
sudo nano photo-cleanup.shOption 1: Client Script:
#!/bin/sh

albumdir=$1

# use below variables if running on the server
# nextclouddir="/var/www/nextcloud"
# user who owns the photos
# nextclouduser=""

echo "Changing modified date to shot date..."
exiftool "-filemodifydate<datetimeoriginal" -r "$albumdir"

echo "Renaming files to shot date..."
exiftool '-FileName<DateTimeOriginal' -r -d "%Y-%m-%d_%H.%M.%S%%-c.%%e" "$albumdir"

# uncomment the below command if running on the server
# echo "Re-scanning your Nextcloud data directory..."
# sudo -u www-data php "$nextclouddir"/occ files:scan "$nextclouduser"

exit 0
Option 2: Server Script:
#!/bin/sh

albumdir=$1

# use below variables if running on the server
nextclouddir="/var/www/nextcloud"
# user who owns the photos
nextclouduser=""

echo "Changing modified date to shot date..."
exiftool "-filemodifydate<datetimeoriginal" -r "$albumdir"

echo "Renaming files to shot date..."
exiftool '-FileName<DateTimeOriginal' -r -d "%Y-%m-%d_%H.%M.%S%%-c.%%e" "$albumdir"

# uncomment the below command if running on the server
echo "Re-scanning your Nextcloud data directory..."
sudo -u www-data php "$nextclouddir"/occ files:scan "$nextclouduser"

exit 0
I’ll break down what’s happening above:
albumdir=$1Sets your album directory as the first argument when you execute the script.
nextclouddir="/var/www/nextcloud"Server script only: set to your Nextcloud install folder.
nextclouduser=""Server script only: set to the Nextcloud user that owns the photo directory.
exiftool "-filemodifydate<datetimeoriginal" -r "$albumdir"Instructs exiftool to read
datetimeoriginal(date and time the photo was shot) from each photo and apply it as thefilemodifydate. The-rflag runs the command recursively so it will work its way through all folders in the photos directory.exiftool '-FileName<DateTimeOriginal' -r -d "%Y-%m-%d_%H.%M.%S%%-c.%%e" "$albumdir"Similar to the previous command but applies
datetimeoriginalto the filename. The-dflag specifies how the date and time data are laid out in the new filename.
Test the script
Warning: If you’re choosing to run the server script, keep in mind that the final files:scan command can take a long time to complete depending on the amount of photos and speed of your instance. It’s best to run it during a scheduled maintenance window.
Let’s test this simple script on a directory of photos.
Give the script permission to execute.
chmod +x photo-cleanup.sh
You can see below a directory filled with photos. Note the modify dates and filenames on the right side.
ls -al Photos
total 35340
drwxrwxr-x 2 raylyon raylyon    4096 Aug  6 18:49 .
drwxr-xr-x 6 raylyon raylyon    4096 Oct 25 21:51 ..
-rwxr-xr-x 1 raylyon raylyon 6280032 Oct 19 01:42 P1060462.jpg
-rwxr-xr-x 1 raylyon raylyon 4056662 Oct 19 02:02 P1060468.jpg
-rwxr-xr-x 1 raylyon raylyon 4915105 Oct 19 02:05 P1060481.jpg
-rwxr-xr-x 1 raylyon raylyon 6375408 Oct 19 02:06 P1060530.jpg
-rwxr-xr-x 1 raylyon raylyon 6635572 Oct 19 02:06 P1060546.jpg
-rwxr-xr-x 1 raylyon raylyon 7903375 Oct 19 02:08 P1060552.jpg
Now we’ll run the script on this directory.
./photo-cleanup.sh "/home/raylyon/Nextcloud/Photos"
Changing modified date to shot date...
    1 directories scanned
    6 image files updated
Renaming files to shot date...
    1 directories scanned
    6 image files updated
ls -al Photos
total 35340
drwxrwxr-x 2 raylyon raylyon    4096 Oct 25 21:56 .
drwxr-xr-x 6 raylyon raylyon    4096 Oct 25 21:51 ..
-rwxr-xr-x 1 raylyon raylyon 6280032 Jul 31 11:27 2020-07-31_11.27.39.jpg
-rwxr-xr-x 1 raylyon raylyon 4056662 Jul 31 12:09 2020-07-31_12.09.05.jpg
-rwxr-xr-x 1 raylyon raylyon 4915105 Jul 31 12:35 2020-07-31_12.35.29.jpg
-rwxr-xr-x 1 raylyon raylyon 6375408 Aug  1 08:22 2020-08-01_08.22.03.jpg
-rwxr-xr-x 1 raylyon raylyon 6635572 Aug  1 19:46 2020-08-01_19.46.18.jpg
-rwxr-xr-x 1 raylyon raylyon 7903375 Aug  1 19:47 2020-08-01_19.47.24.jpg
Just like that, our filenames and metadata are updated.
(Optional) Add a Cron job
You could run the script manually each time you add photos, but who has time for that? If you’re frequently adding new photos and directories, you can automate it.
To do so, we’ll add an entry to the crontab on the client or server.
Client (user crontab)
crontab -e
Server (system crontab)
sudo crontab -e
*/30 * * * * /path/to/your/script/photo-cleanup.sh "/path/to/Nextcloud/Photos"
The above entry runs the script every 30 minutes, checking the directory and any sub-directories for new photos and updating them accordingly. Adjust the timing to your needs.
Have any great Nextcloud photo tips that I missed? Shoot me an email or leave a comment below. Thanks for reading and happy hacking!
Leave a comment