Setting up a ZFS-backed KVM Hypervisor on Ubuntu 18.04
The ability to run several virtual servers in a single physical box is what makes it possible for businesses of all sizes to run complex applications with minimal cost and power usage. Most importantly, (arguable) it’s what enables people like me to learn and practice near real-world Linux administration in a one-bedroom Brooklyn apartment.
The key to getting this working is a fast, reliable hypervisor. In this tutorial, we’re going to be setting up our virtual environment with KVM/QEMU as the hypervisor using ZFS for our VM storage.
The Tools
- Ubuntu 18.04 Server - Our host OS, chosen due to its out-of-the-box support for the ZFS filesystem. I’m assuming you already have Ubuntu installed and have SSH access to the system.
- ZFS Filesystem - There are many on the web who can speak to the benefits of ZFS better than I can, but essentially ZFS is a ultra-reliable filesystem and logical volume manager with built-in software RAID, checksums, compression, and de-duplicaton. On top of that, it’s very straightforward to configure and manage.
- KVM/QEMU - Industry-standard, open-source, Linux-based VM hypervisor. Manageable from the CLI or any number of GUI applications (i.e. virt-manager)
Sections in this Tutorial
- Install & Configure ZFS
- Install & Configure KVM/QEMU
- Create a VM
- Managing KVM via CLI
- Managing KVM with virt-manager
- Concluding thoughts
Step 1: Install & Configure ZFS
Below are the steps I used to configure a ZFS storage pool on my PowerEdge T30. On that system, I’m using (3) 4TB drives in a RAIDz1 array, allowing for one disk failure and providing more than adequate I/O performance. The RAID type you choose depends on a lot of factors, and I suggest you read one of the many articles about the benefits/drawbacks of the different types (Wikipedia). For the purpose of this guide, I’ll be using x3 4GB virtual disks in RAIDz1.
First, update your repos and install the ZFS packages:
$ sudo apt update
$ sudo apt install zfsutils-linux
Assuming you didn’t get an error message, ZFS should now be installed on your machine.
Next, we need to get the names of the drives we’re going to use:
$ sudo fdisk -l
You should see an output similar to this:
Disk /dev/vda: 25 GiB, 26843545600 bytes, 52428800 sectors
Units: sectors of 1 * 512 = 512 bytes
Sector size (logical/physical): 512 bytes / 512 bytes
I/O size (minimum/optimal): 512 bytes / 512 bytes
Disklabel type: gpt
Disk identifier: 07BCD546-2A83-4F37-822F-C7E7B7B8811A

Device     Start      End  Sectors Size Type
/dev/vda1   2048     4095     2048   1M BIOS boot
/dev/vda2   4096 52426751 52422656  25G Linux filesystem


Disk /dev/vdb: 4 GiB, 4294967296 bytes, 8388608 sectors
Units: sectors of 1 * 512 = 512 bytes
Sector size (logical/physical): 512 bytes / 512 bytes
I/O size (minimum/optimal): 512 bytes / 512 bytes


Disk /dev/vdc: 4 GiB, 4294967296 bytes, 8388608 sectors
Units: sectors of 1 * 512 = 512 bytes
Sector size (logical/physical): 512 bytes / 512 bytes
I/O size (minimum/optimal): 512 bytes / 512 bytes


Disk /dev/vdd: 4 GiB, 4294967296 bytes, 8388608 sectors
Units: sectors of 1 * 512 = 512 bytes
Sector size (logical/physical): 512 bytes / 512 bytes
I/O size (minimum/optimal): 512 bytes / 512 bytes
You can see above that /dev/vda is my OS drive and /dev/vdb /dev/vdc /dev/vdd are the disks we’ll use for our ZFS RAID. Make note of these names.
Now we’ll create our RAIDz1 pool using the above disks, with zfs-pool as the pool name.
$ sudo zpool create zfs-pool raidz1 vdb vdc vdd
If you receive no error message, you’ve successfully created your pool. Now, check the status of your pool.
$ sudo zpool status
 pool: zfs-pool
 state: ONLINE
  scan: none requested
config:

	NAME        STATE     READ WRITE CKSUM
	zfs-pool    ONLINE       0     0     0
	  raidz1-0  ONLINE       0     0     0
	    vdb     ONLINE       0     0     0
	    vdc     ONLINE       0     0     0
	    vdd     ONLINE       0     0     0

errors: No known data errors
The newly created pool should be already mounted at the root of your system as /zfs-pool.
Step 2: Install & Configure KVM/QEMU
The below command will install all the components we need to get KVM up and running.
$ sudo apt install qemu-kvm libvirt-clients libvirt-daemon-system bridge-utils virt-manager
Next, we’ll configure the network bridge. This will allow your VMs to get a routable IP address on your local network.
As of 18.04, Ubuntu deprecated /etc/network/interfaces and now encourages the use of a yaml file located at /etc/netplan. We’re going to be editing this file to enable the bridge.
First, find the name of your primary network interface using the ip a command.
$ ip a
1: lo: <LOOPBACK,UP,LOWER_UP> mtu 65536 qdisc noqueue state UNKNOWN group default qlen 1000
    link/loopback 00:00:00:00:00:00 brd 00:00:00:00:00:00
    inet 127.0.0.1/8 scope host lo
       valid_lft forever preferred_lft forever
    inet6 ::1/128 scope host
       valid_lft forever preferred_lft forever
2: ens3: <BROADCAST,MULTICAST,UP,LOWER_UP> mtu 1500 qdisc fq_codel state UP group default qlen 1000
    link/ether 52:54:00:6e:a9:d6 brd ff:ff:ff:ff:ff:ff
    inet 10.0.0.80/24 brd 10.0.0.255 scope global ens3
       valid_lft forever preferred_lft forever
    inet6 fe80::5054:ff:fe6e:a9d6/64 scope link
       valid_lft forever preferred_lft forever
We can see above that our main interface is ens3. Make note of this as we edit the files in /etc/netplan.
Ubuntu has kindly created a default file for us at `/etc/netplan/50-cloud-init.yml’. Open this file in your favorite text editor and set the following parameters. (I’ve added comments next to the changes)
$ sudo nano /etc/netplan/50-cloud-init.yml
# This file is generated from information provided by
# the datasource.  Changes to it will not persist across an instance.
# To disable cloud-init's network configuration capabilities, write a file
# /etc/cloud/cloud.cfg.d/99-disable-network-config.cfg with the following:
# network: {config: disabled}
network:
    version: 2
    ethernets:
      ens9:  #Your interface name
        dhcp4: no   #Indicates that we're setting a static IP address
        dhcp6: no

    bridges:
      br0:
        interfaces: [ens9]   #Your interface that the bridge will share
        dhcp4: no
        addresses: [10.0.0.10/24]   #Static IP of your server followed by netmask
        gateway4: 10.0.0.251   #Your gateway address (usually your router)
        nameservers:
          addresses: [8.8.8.8, 8.8.4.4]  #DNS servers
Save your file and exit the text editor.
Apply your changes:
$ sudo netplan apply
Confirm your configuration.
$ ip a
1: lo: <LOOPBACK,UP,LOWER_UP> mtu 65536 qdisc noqueue state UNKNOWN group default qlen 1000
    link/loopback 00:00:00:00:00:00 brd 00:00:00:00:00:00
    inet 127.0.0.1/8 scope host lo
       valid_lft forever preferred_lft forever
    inet6 ::1/128 scope host
       valid_lft forever preferred_lft forever
2: ens3: <BROADCAST,MULTICAST,UP,LOWER_UP> mtu 1500 qdisc fq_codel master br0 state UP group default qlen 1000
    link/ether 54:bf:64:92:0b:74 brd ff:ff:ff:ff:ff:ff
3: br0: <BROADCAST,MULTICAST,UP,LOWER_UP> mtu 1500 qdisc noqueue state UP group default qlen 1000
    link/ether 82:56:88:0d:dc:fb brd ff:ff:ff:ff:ff:ff
    inet 10.0.0.10/24 brd 10.0.0.255 scope global br0
       valid_lft forever preferred_lft forever
    inet6 fe80::8056:88ff:fe0d:dcfb/64 scope link
       valid_lft forever preferred_lft forever
Your new VMs will now be reachable within your network.
Step 3: Create a VM
New virtual machines can be created and managed in the command line via the virt-install and virsh commmands. I recommend reading the man pages to get an idea of their full capabilites, but for now we’ll use them to create our first Centos7 VM.
Download the latest Centos7 ISO file to your home directory using wget.
$ wget http://isoredirect.centos.org/centos/7/isos/x86_64/CentOS-7-x86_64-DVD-1810.iso
The ISO file will download and notify you on completion. Once finished, create a folder called images and put our newly downloaded ISO there. You’ll likely be downloading a lot of these and your home directory will get cluttered quickly, so a little organization now will help you in the long run.
$ mkdir ~/images
$ mv ~/CentOS-7-x86_64-DVD-1810.iso ~/images/CentOS-7-x86_64-DVD-1810.iso
While we’re on the subject, let’s create a folder on our shiny new ZFS volume where we’ll store our VMs.
$ mkdir /zfs-pool/vm
Now we’re going to create our virtual machine in our ZFS volume using the newly downloaded ISO.
$ sudo virt-install --name=vm-centos7-01 --vcpus=1 --memory=1024 --cdrom=/home/[username]/images/CentOS-7-x86_64-DVD-1810.iso --disk path=/zfs-pool/vm-centos-01,size=25 --os-variant=centos7.0 --graphics vnc,listen=0.0.0.0 --noautoconsole
I’ll break down each one of these parameters:
--name #Name of our new VM.
--vcpus #Number of virtual CPU cores we're assigning to our VM
--memory #Amount of RAM in MB being assigned
--cdrom #Path to ISO
--disk path #Desired location of VM. Be sure to choose the path of your ZFS filesystem.
--disk size #Size of the virtual hard drive
--os-variant #Helps KVM optimize performance for your guest OS.
--graphics #Serves the installer over VNC so we can complete the graphical steps
--listen #Serves VNC on localhost
--noautoconsole #virt-install won't attempt to launch any graphical console outside VNC
Run the above command to begin creating the VM. It should give you the below result before returning you to a prompt.
Starting install...
Domain installation still in progress. You can reconnect to
the console to complete the installation process.
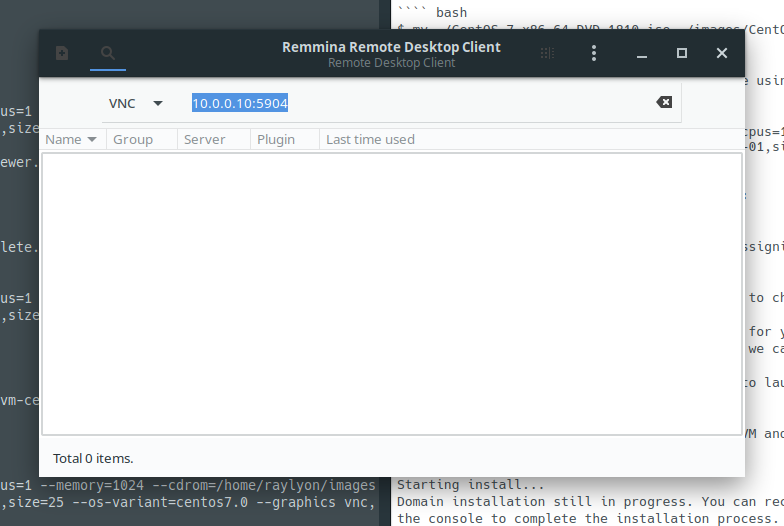
We need to find out which port VNC is broadcasting on so we can complete the graphical Centos7 installer over VNC. To do this, run the following command.
$ virsh vncdisplay vm-centos7-01
:4
In this case, the command returned 4, which means our VNC is running in port 5904.
From a computer on the network, open your favorite VNC client and connect to your hypervisor using its IP and port 5904. In our case it would be 10.0.0.10:5904.
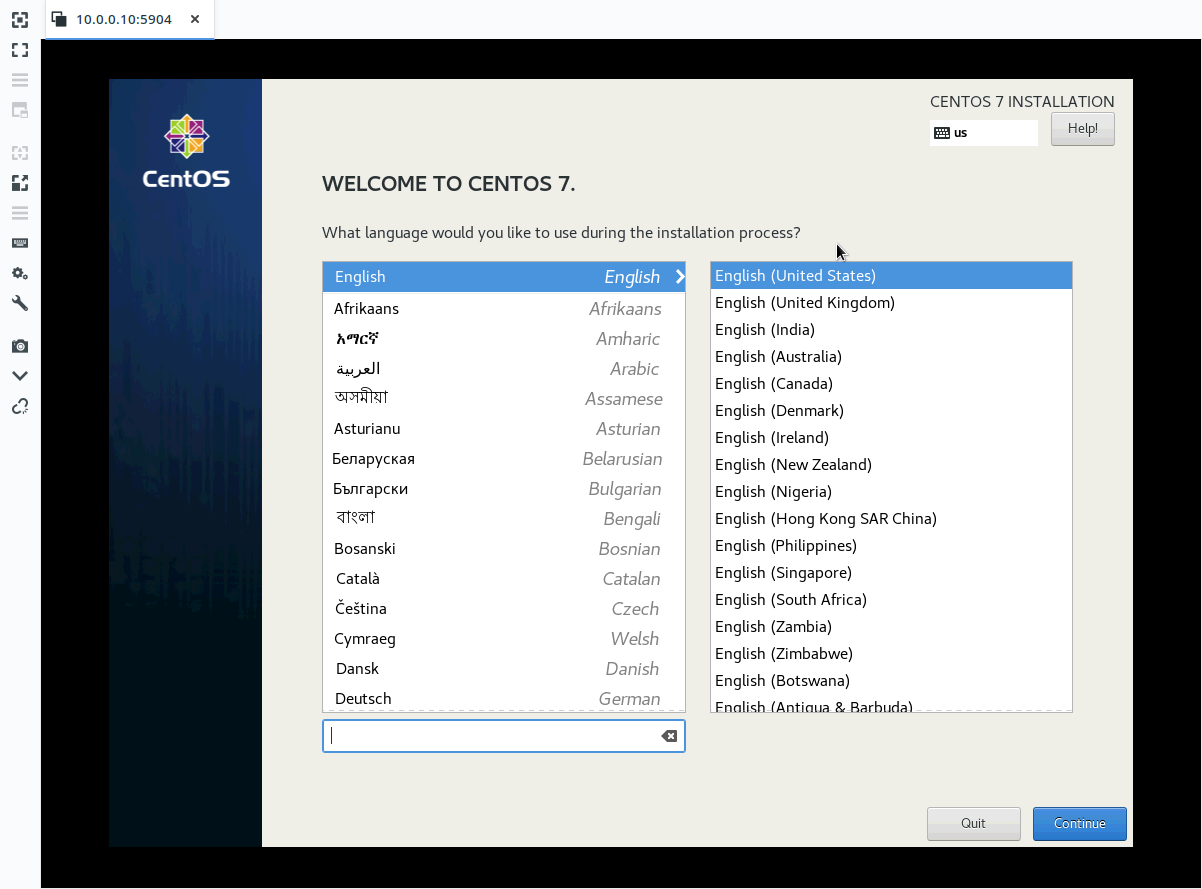
From here you can complete the OS installation and set a static IP address. Further management can then be done over SSH.
Step 4: Managing KVM Through the CLI
Below are some useful commands for managing the state of your virtual machine from the hypervisor’s terminal. For a complete list of commands and options, I suggest you run man virsh.
List Virtual Machines
$ virsh list --all
Shutdown & Start Guest
$ virsh shutdown vm-centos-01
$ virsh start vm-centos-01
$ virsh reboot vm-centos-01
Autostart VM with Hypervisor
$ sudo virsh autostart vm-centos-01
Step 5: Managing KVM with Virt-Manager
For those of you who want to avoid the command line, there’s a wonderful GUI tool called virt-manager, and it’s available in nearly every distro’s package manager. Let’s install it now on our Ubuntu Desktop machine.
$ sudo apt install virt-manager
In order to connect to our KVM hypervisor, we’ll have generate SSH keys on our desktop machine and copy them to the hypervisor. If you don’t already have SSH keys generated, open a terminal and generate an SSH key pair by running the command below and following the prompts.
$ ssh-keygen
Generating public/private rsa key pair.
Enter file in which to save the key (/home/$USER/.ssh/id_rsa):
Created directory '/home/$USER/.ssh'.
Enter passphrase (empty for no passphrase):
Enter same passphrase again:
Your identification has been saved in /home/$USER/.ssh/id_rsa.
Your public key has been saved in /home/$USER/.ssh/id_rsa.pub.
The key fingerprint is:
SHA256:D6wWmAEgpwxFeErFbGXs93fC53XSWPyycMXirrnzuPk $USER@ubuntu-1804
The key's randomart image is:
+---[RSA 2048]----+
|+=O.oo           |
|=+.=..           |
|o+. o          o |
|.    = o      . =|
|    o o S .  . *.|
|       o + +.o*.+|
|      o   o =+.+.|
|     .      .=o  |
|            BBE  |
+----[SHA256]-----+
Next, we’re going to send our SSH public key to the hypervisor by piping it through SSH. Subsitute the IP address in the below command for that of your hypervisor. You’ll be asked to enter the password for the server’s user account.
cat ~/.ssh/id_rsa.pub | ssh username@10.0.0.10 "mkdir -p ~/.ssh && cat >> ~/.ssh/authorized_keys"
The above command fetches your generated public key, connects to your hypervisor with SSH, creates the ~/.ssh directory, and pastes the key in the ~/.ssh/authorized_keys file.
Once your key is copied, you can open virt-manager and get connected. Open the application and select File-> Add Connection.

Check both boxes and enter the username and hostname/IP address of the hypervisor, then click OK.
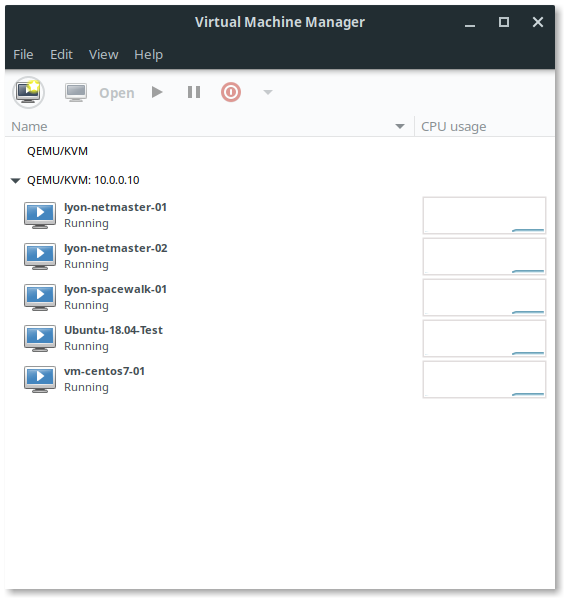
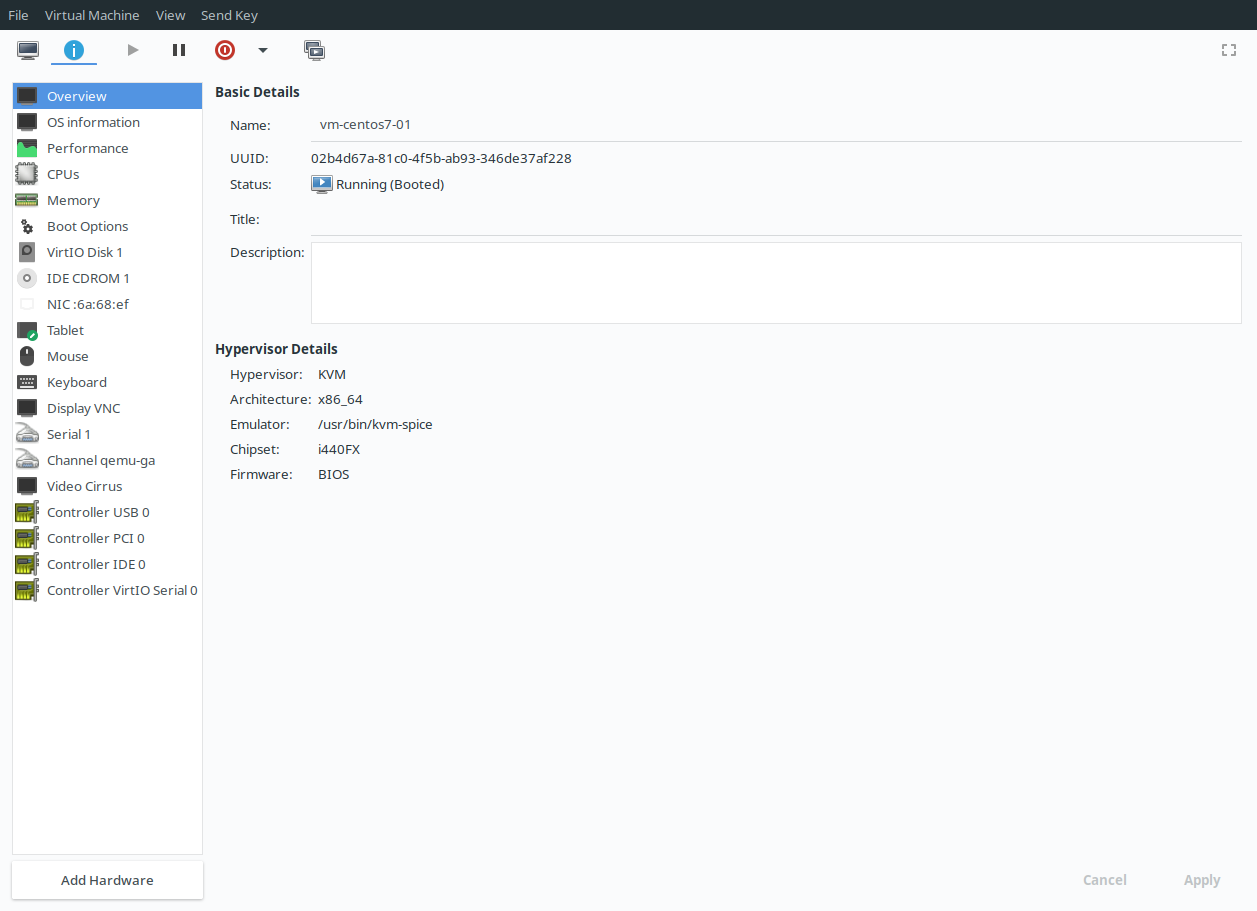
If everything went right, you should see your VM and any others you’ve created in the window. Double clicking on a VM will open a console and allow you to control the system, change settings, take snapshots, and just about anything else you’d want to do with your VM.
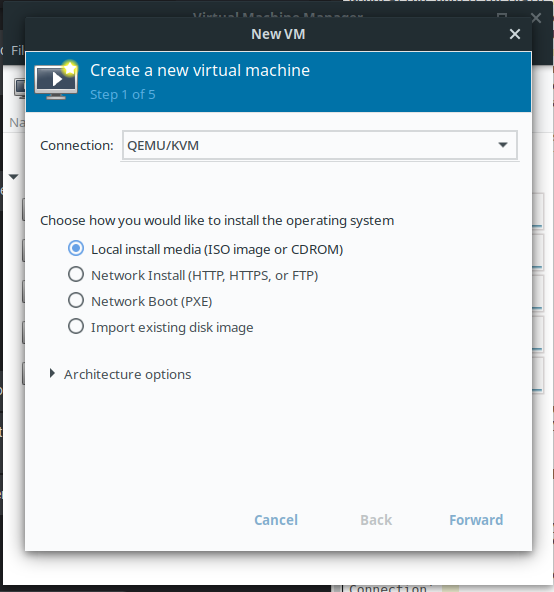
You can even create entirely new VMs with virt-manager.
 \
\
Concluding Thoughts
You should now have a fully functioning KVM hypervisor running on top of the ZFS filesystem! As long as you set the location of your VMs to the ZFS pool, all your systems will benefit from the reliability and robust featureset of ZFS.
This is meant to be a very base-level configuration, so you should do your research and implement stronger security and some sort of backup solution. I may be covering these in future posts, but in the mean time I’ll link some helpful resources below. As always, please reach out to me via email or in the comments below if you have questions, thoughts, or criticisms.
Thanks for reading and happy hacking!
Helpful Resources
KVM Cheatsheet - Programster
ZFS command line reference - The Geek Diary
Leave a comment